

GROUND FLOOR
The ceiling is mounted in the technique room. We continue our work from the next floor, because it is easier laying insulation downwards than upwards. We prepare first the kitchen floor.
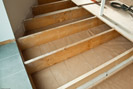
Wire is attached to the wood beams over the "Troldtekt" acustic panels (which are covered with cardboard paper) on the kitchen level, in order to prevent the kitchen floor and the insulation as well to fall down in the cellar in case of fire. 2 layers of rockwool are placed in between the beams. And over it a rectangular piece of plywood to form some kind of lid and to stabilize the final floor. A big sheet of plywood is skrewed to the beams.
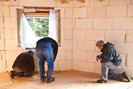
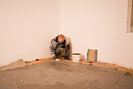
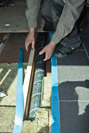
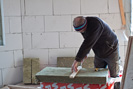 Anton is measuring plates of rockwool
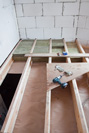
 Do not forget space for different kind of pipes and the ventilation!
 Under the rockwool the brown cardboard paper is visible
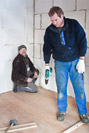
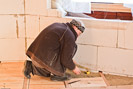 Anton places sheets of plywood over the insulation
 It's nice when you get help from your family or your friend
 There is a plate of plywood on the final floor before the laying of the tiles
Once the floor was laid, the walls had to be covered with a layer of stopping and then painting. The ceiling had to be covered with a sheet of painted glasfiberpaper, before a special type of ceiling gets created. It's a family creation! The 12-sided form of the house inspired us to create a flower shaped ceiling out of wooden lists. The heart of the flower is placed in the middle of the house, and there are 12 petals corresponding to the 12 sides of the house.
 There have to be more lists inbetween the beams in order to fix the ceiling
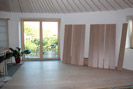
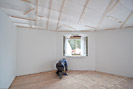 The floor is ready for the laying of the tiles and the ceiling for the wooden lists
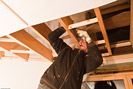
 Here we began to form the special ceiling...to be continued...still for many hours
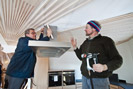 It's quite difficult to make this ceiling alone! It´s very nice to have friends to help!
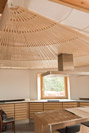 Here you get an idea, how it is looking like
Before the kitchen has to be mounted, tiles have to be laid on the floor. Not easy to get it solid, when it is so cold outside!
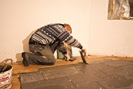 Tiles get only laid where the floor is visible
 The tiles are ready for the joints
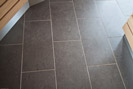
Now the floor is ready for the mounting of the kitchen
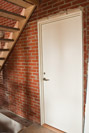
The old door which was leading outside on the terrace got replaced by a new, insulated, firesafe door
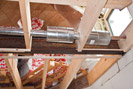
To be able to go on with the mounting of the ceiling, ventilation pipes have to be installed
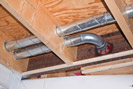 Snapshot of the ventilation system
 You can see the cardboard paper which is covering the ceiling in the basement
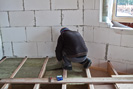
 Inbetween the beams Anton is laying 2 layers of insulation
 Don't forget what has to be laid too! Ventilation pipes, tubes for electricity, etc.
We are halfway now!
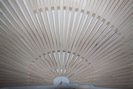
Details of the ceiling
 The ceiling looks like a daisy.